Introduction
Preparing files for print is one of the most important technical skills every graphic designer must learn. A design that looks perfect on screen can turn into a disaster when printed if the file is not prepared correctly. Issues like blurry images, wrong colors, cut-off text, or incorrect sizing are common when print guidelines are ignored.
In 2025, even though digital design dominates, print design is still widely used for:
- Business cards
- Flyers and brochures
- Posters and banners
- Packaging
- Magazines and catalogs
This guide will help you understand how to prepare print-ready files correctly, whether you are a beginner or a professional designer. By following these steps, you can avoid costly printing mistakes and deliver professional-quality print designs.
Why Print File Preparation Is Important
Print design works very differently from digital design.
If files are not prepared correctly, it can result in:
- Blurry or pixelated prints
- Incorrect colors
- Missing margins or cut-off content
- Printer rejections
- Extra cost and reprints
Proper print preparation ensures your design looks exactly as intended when it comes off the press.
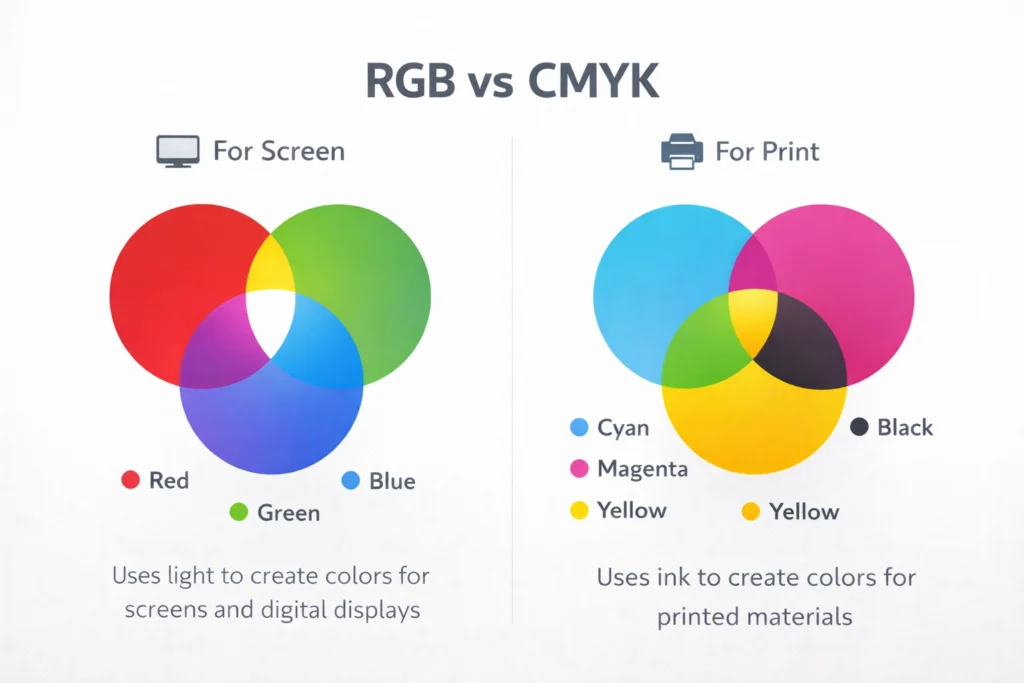
Understand the Difference Between RGB and CMYK
One of the most common mistakes designers make is using the wrong color mode.
RGB (Red, Green, Blue)
- Used for screens (web, mobile, social media)
- Colors appear brighter
- Not suitable for print
CMYK (Cyan, Magenta, Yellow, Black)
- Used for printing
- Colors are mixed using ink
- Essential for print accuracy
Best Practice
Always convert your design to CMYK mode before sending it for print.
Choose the Correct Document Size
Your document size must match the final print size exactly.
Common Print Sizes
- Business card: 3.5 × 2 inches
- Flyer: A5 or A4
- Poster: A3, A2
- Brochure: A4 folded
Best Practice
Always confirm size requirements with the printer before starting the design.
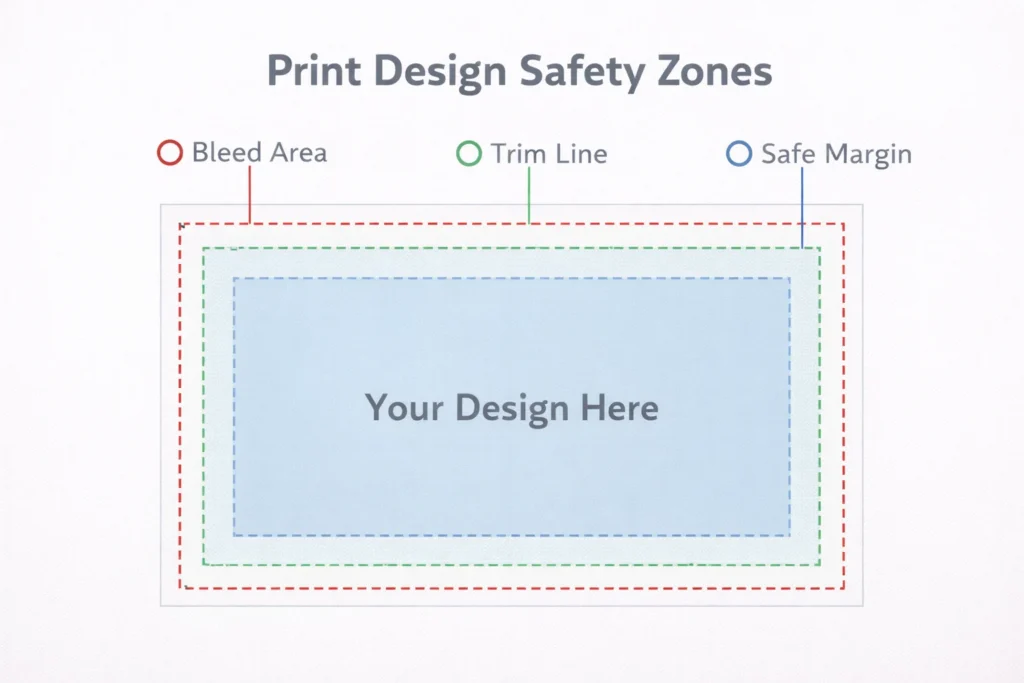
Set Proper Bleed, Trim, and Margin
Bleed, trim, and margin are critical in print design.
Bleed
Bleed is the extra area beyond the final cut size.
- Standard bleed: 3 mm (0.125 inch)
- Prevents white edges after trimming
Trim Line
This is where the paper will be cut.
Safe Margin
Keep important text and logos inside the safe margin to avoid being cut.
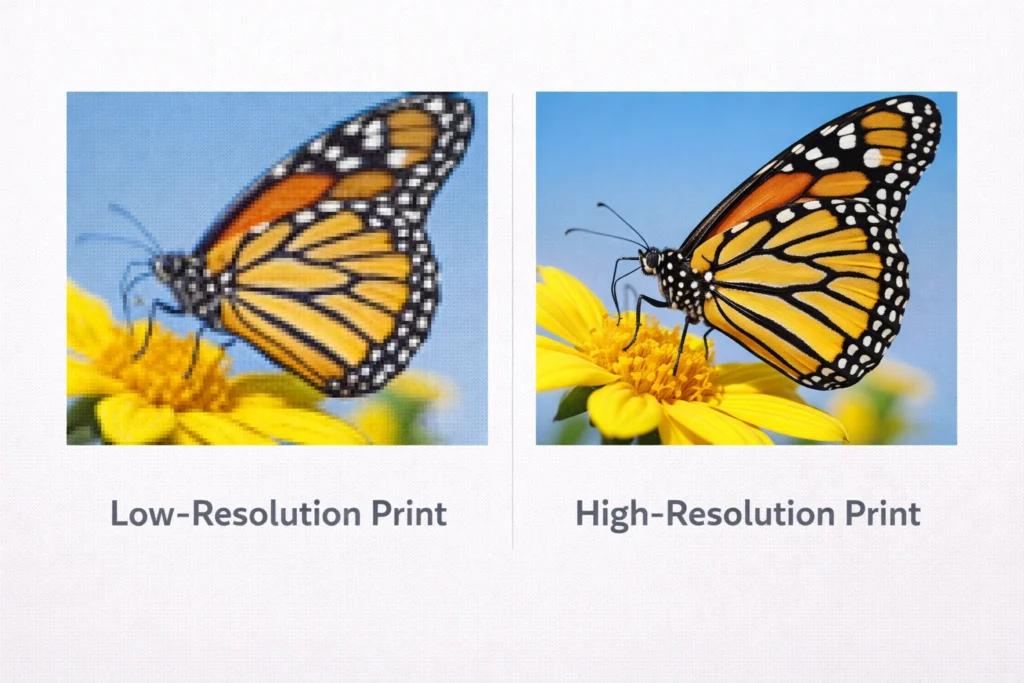
Use High-Resolution Images
Low-resolution images look blurry when printed.
Image Resolution Rules
- Minimum: 300 DPI for print
- Avoid screenshots or web images
- Use original high-quality images
Tip
Always check image resolution before exporting the final file.
Choose the Right File Format
Different printers prefer different file formats.
Best Print File Formats
- PDF (most recommended)
- TIFF (high-quality images)
- EPS (vector graphics)
- AI or INDD (if printer requests source files)
Best Practice
Export a print-ready PDF unless the printer asks otherwise.
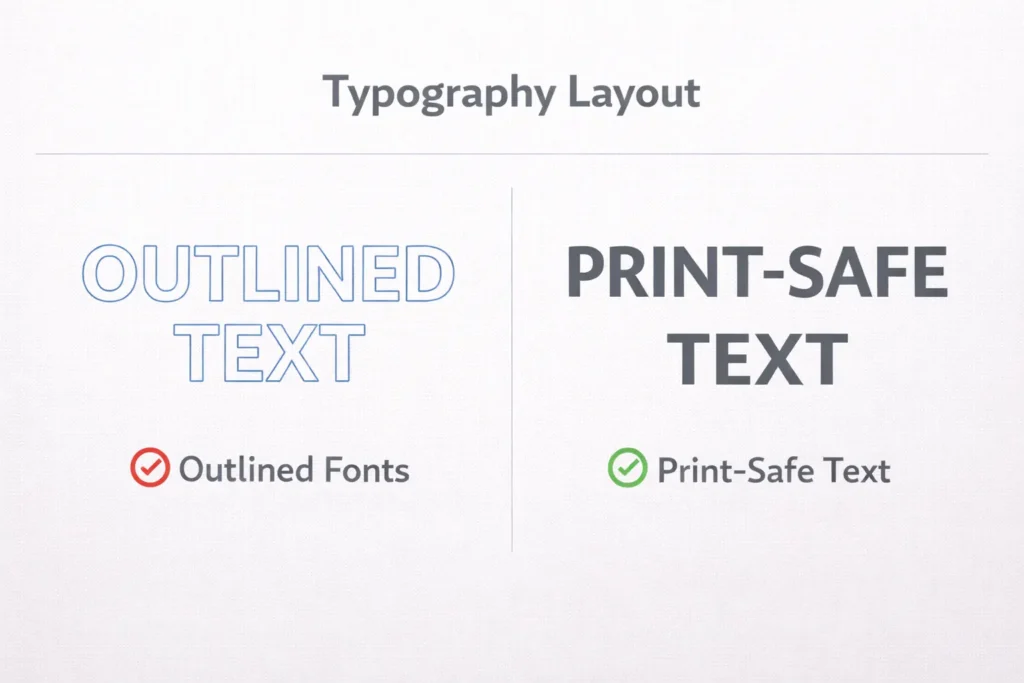
Convert Fonts to Outlines or Embeded Them
Missing fonts can change the entire design.
Two Safe Options
- Convert text to outlines (recommended)
- Embed fonts while exporting PDF
Important
Always keep an editable copy before converting fonts to outlines.
Check Color Accuracy Before Printing
Colors on screen may not match print results.
Best Practices
- Use CMYK color values
- Avoid neon or very bright colors
- Request a print proof if possible
Professional printers often provide test prints-always approve them before final production.
Flatten Transparencies
Effects like shadows and gradients can cause printing issues.
Why Flattening Helps
- Prevents unexpected output
- Ensures compatibility with printers
- Avoids transparency errors
Most design software offers an option to flatten transparencies during export.
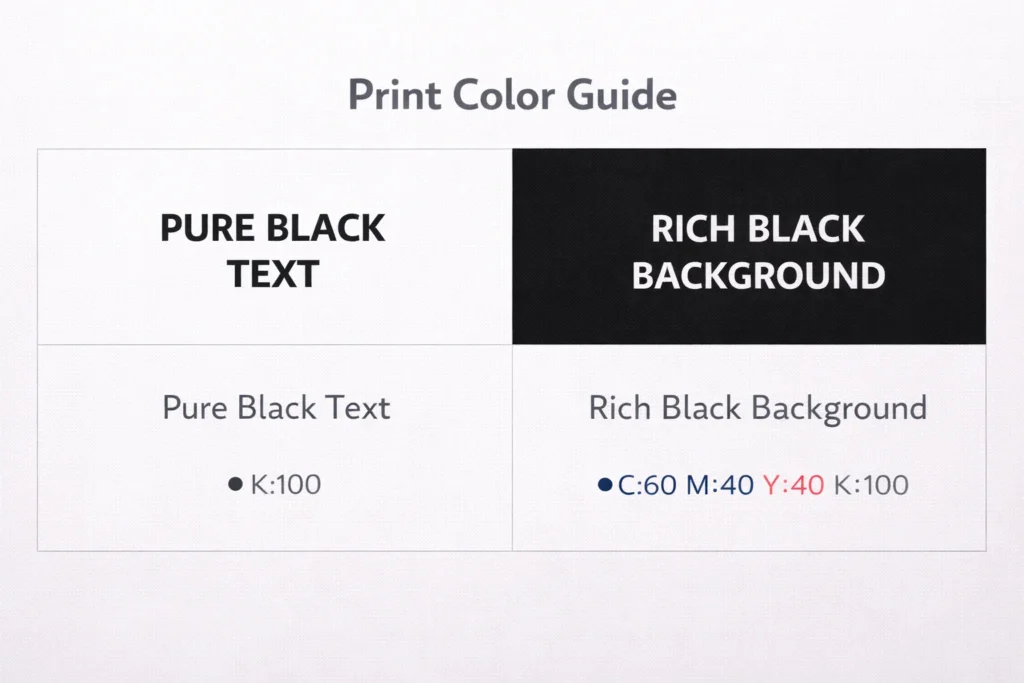
Check Black Color Usage
Using the wrong black can affect print quality.
Types of Black
- 100% Black (K) – for text
- Rich Black (CMYK mix) – for backgrounds
Using rich black for small text can cause blurring.
Proofread Everything Carefully
Once printed, mistakes cannot be undone.
Always Check
- Spelling and grammar
- Phone numbers and email IDs
- Alignment and spacing
- Image placement
A final proof saves time, money, and reputation.
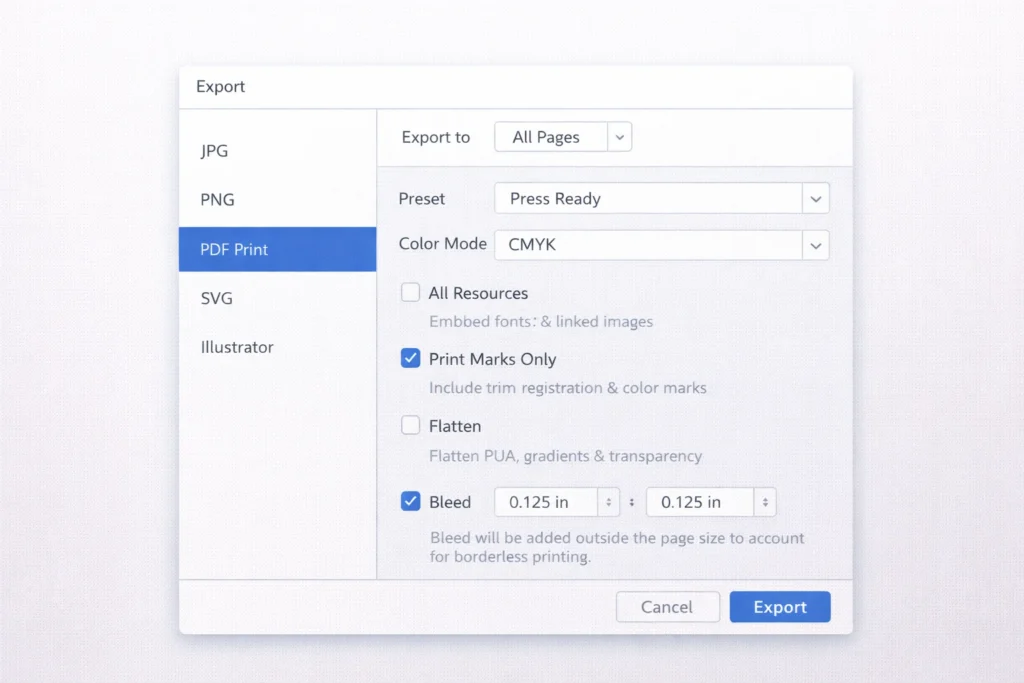
Export Print-Ready PDF Settings
When exporting your file:
- Use CMYK color mode
- Include bleed
- Set 300 DPI
- Embed fonts
- Use PDF/X-1a or PDF/X-4 if required
Always follow printer specifications.
Common Print File Preparation Mistakes
Avoid these common errors:
- Designing in RGB
- Forgetting bleed
- Using low-resolution images
- Ignoring printer guidelines
- Not proofing the file
Being careful at this stage ensures professional results.
Tips for Working With Printers
- Communicate early
- Ask for file guidelines
- Share mockups
- Request proofs
- Keep backups
Good communication leads to better print results.
Conclusion
Preparing files for print is a crucial skill that separates amateur designers from professionals. In 2025, clients expect designers to deliver print-ready files without errors. By understanding color modes, resolution, bleed, file formats, and export settings, you can ensure your designs look flawless in print.
Print mistakes are expensive-but they are completely avoidable with the right knowledge. Mastering print file preparation will boost your confidence, improve your work quality, and strengthen your professional reputation as a graphic designer.